
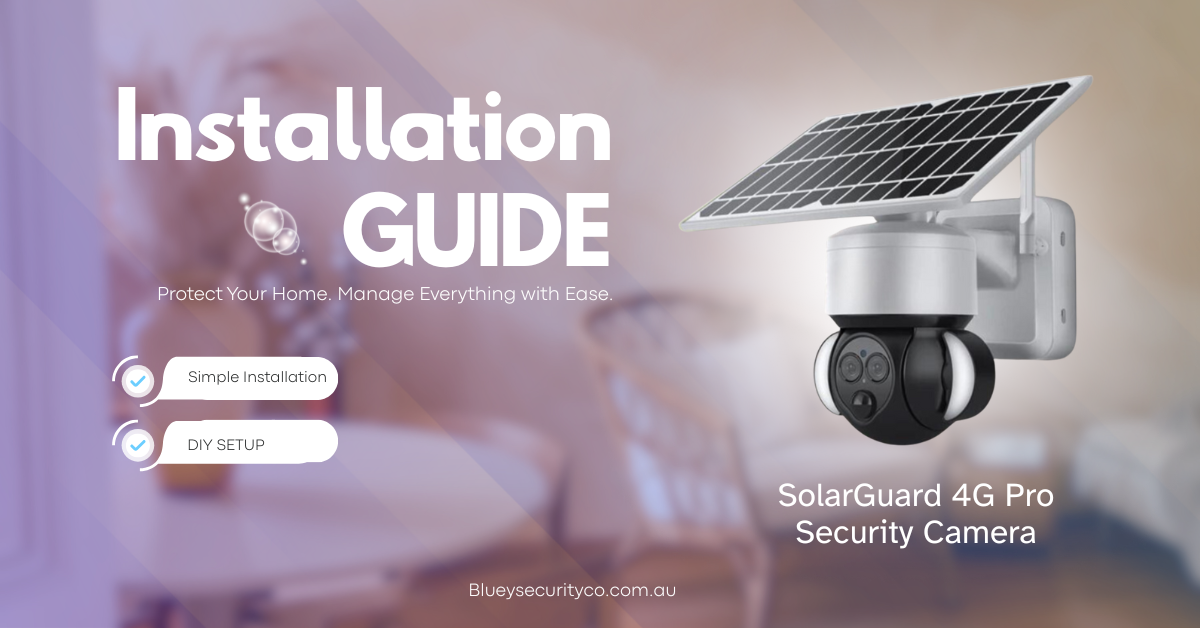
If you’ve recently purchased the SolarGuard 4G Pro from Bluey Security Co., you’re about to upgrade your home or property with a powerful, worry-free security camera. This solar-powered unit offers 4G connectivity, 360° coverage, floodlights, and no need for WiFi or mains power in many cases.
In this guide you’ll learn how to unpack, mount, power up, connect, configure and maintain the SolarGuard 4G Pro, all in clear and easy steps.
Unpack & Check What’s Included
Your box should include:
- The SolarGuard 4G Pro camera unit with solar panel and bracket.
- A solar panel (likely 7.5 W) with extension cable for flexible placement.
- Wall-mounting bracket, screws and plugs (for DIY installation).
- A quick-start guide / manual.
- Important note: you’ll need to supply a 4G nano-SIM card with a data plan if you use the 4G option (SIM not included).
Before you drill, check:
- Your installation site has good sunlight for the panel.
- If using 4G, you have mobile data coverage (4G signal) at the site.
- If you ever want WiFi backup, note this model emphasises 4G.
Choose the Right Location
Location is key to getting the best from the SolarGuard 4G Pro. Consider:
- Sunlight exposure: The solar panel should face where it gets maximum sunlight (in the Southern Hemisphere this often means north or unobstructed sky).
- 4G signal area: Test your mobile phone where the camera will go. If it gets good 4G reception, the camera will too.
- Viewing angle: The camera supports 355° pan and 90° tilt for 360° coverage.
- Floodlight coverage: Since the unit has built-in LED floodlights, consider how the light will behave at night and whether you want the area illuminated.
- Weather-proof mounting point: The unit is built for outdoor use and harsh conditions.
Pick a mounting spot where the camera can see the area you care about (driveway, yard, gate) and the solar panel can work efficiently.
Mounting the Camera & Solar Panel
Here’s how to install:
- Hold the mounting bracket in place and mark the screw holes on your wall or post.
- Drill the appropriately sized holes, insert wall plugs as needed.
- Screw the bracket securely so the camera will not wobble or shift.
- Mount the camera unit onto the bracket but leave a little play so you can adjust angle later.
- Mount the solar panel nearby, either on the same wall or slightly away if needed, ensuring it faces strong daylight.
- Run the solar cable neatly to the camera. Make sure you secure it (cable clips or conduit) to prevent damage or movement.
- Once the panel is secured, plug its cable into the camera’s solar input port.
By keeping both camera and solar panel firmly fixed and weather sealed, you’ll get reliable operation and fewer maintenance issues.
Power On & Connect via 4G
Since this is a 4G-enabled camera, here’s how to get it online:
- Insert your activated nano-SIM card with a data plan into the camera (check the base/slot location).
- Turn on the camera using the switch under the rubber grommet (or per manual).
- Download the appropriate app (UBOX)
- In the app, choose Add Device → 4G Camera, then scan the QR code on the camera, or follow on-screen prompts.
- Name your device (e.g., “Back-yard Camera”) and confirm connection.
- You should now be able to view live video, receive alerts and access the camera remotely via 4G.
If you encounter issues: check the SIM data plan, ensure 4G signal is strong at the site, verify the camera is turned on and the solar panel is charging.
Configure Settings & Test
Once connected, spend a few minutes setting preferences and running a test:
- Motion Detection / AI Alerts: The camera uses AI & PIR for motion detection and triggers floodlights when humans are detected.
- Night Vision / Floodlights: Configure floodlight operation and check how the camera performs in darkness or low light.
- Recording & Storage: The camera supports local SD card storage (128 GB recommended) or optional cloud. This model emphasises “subscription free storage”.
- Two-Way Audio: Enable the mic/speaker so you can talk via the camera from the app.
- Pan/Tilt Control: Use the app to move the camera and check coverage. A walk-through in front of the camera helps verify detection and alerts.
Complete a real test: walk through the monitored area at night and day. Check if you get alerts, the floodlights trigger, the video feed is clear, and that it records/plays back correctly.
Final Steps & Maintenance
After your initial setup, secure everything:
- Tighten all screws and make sure mounts are stable.
- Use silicone or sealant around any drilled holes to keep out moisture.
- Arrange cables neatly and ensure solar panel is free of debris.
- Every few months: clean the solar panel surface, check battery/charging status, inspect mounts after strong weather.
- Update firmware when prompted in the app to keep the camera running smoothly.
- If the 4G signal weakens, consider moving the device slightly or adding a booster.
You’re All Set!
Your SolarGuard 4G Pro is now ready to provide robust, wireless security coverage, powered by the sun, connected via 4G, and controlled from your phone. With full 360° coverage, smart floodlights and instant alerts, it’s one of the most flexible DIY security camera options you can install yourself.
To learn more or check product options, visit: blueysecurityco.com.au

Leave a comment
This site is protected by hCaptcha and the hCaptcha Privacy Policy and Terms of Service apply.