
-

🚚 Fast & FREE Shipping On All Orders

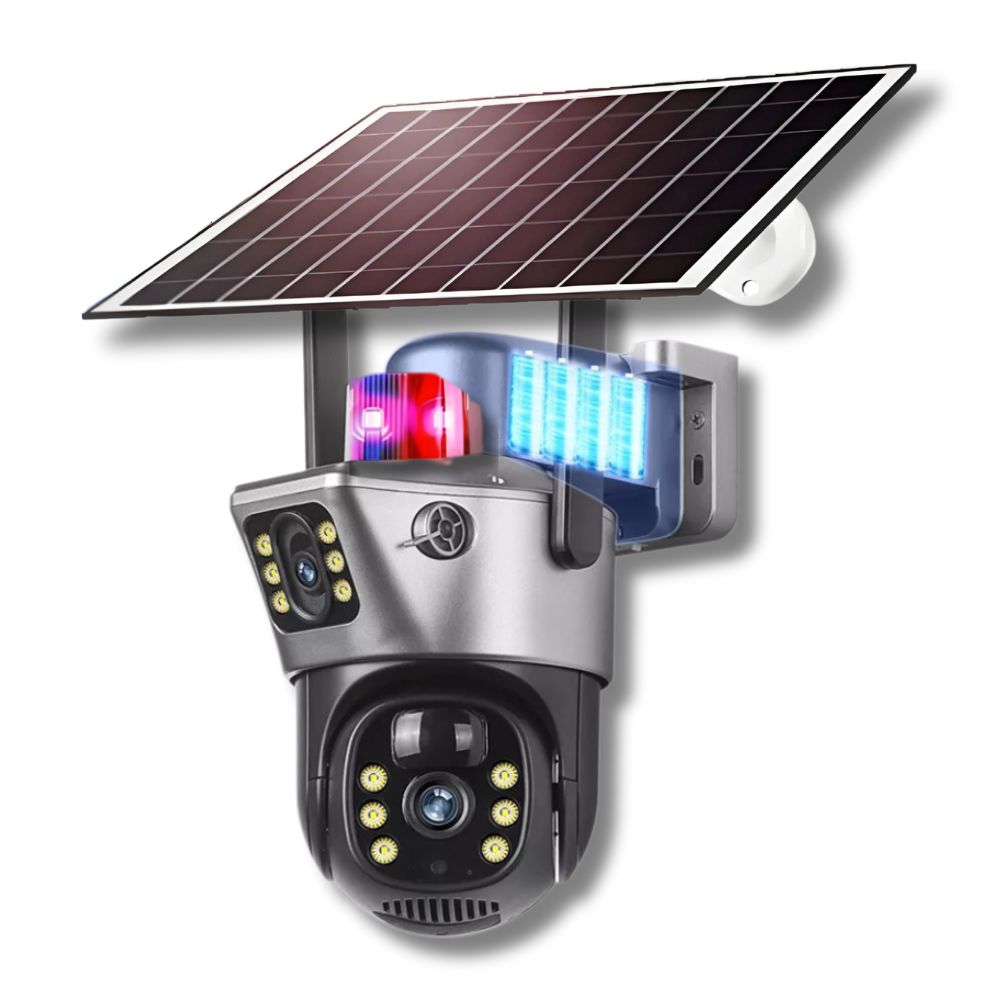

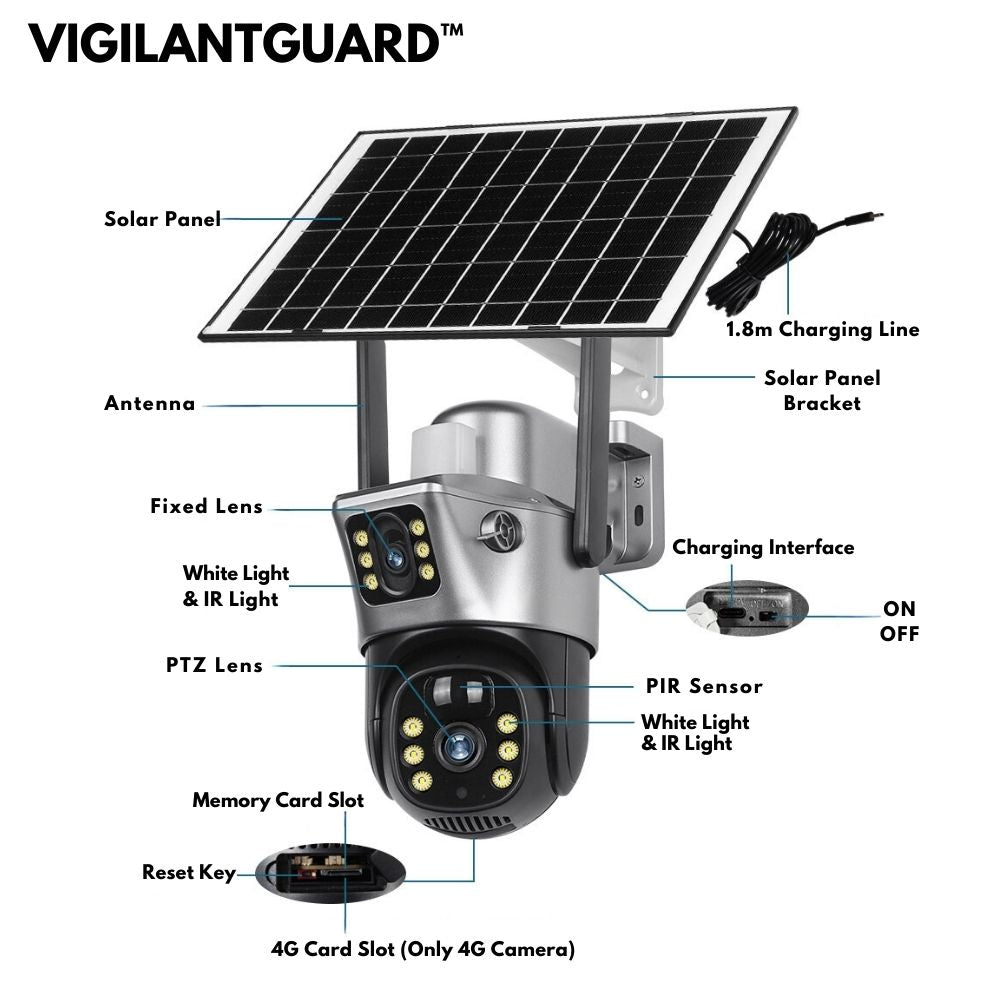
VigilantGuard Pro
Know Your Property Is Always Protected
The VigilantGuard Pro gives you powerful 24/7 protection with 2K dual lenses, solar power and 360° coverage. Choose WiFi or 4G to suit your setup — no wiring or electrician needed. With flashing lights, a loud siren and smart motion tracking, it stops break-ins before they happen. Built tough for harsh conditions, it’s the latest in smart security made easy.
Trusted By Thousands Of Happy Customers
Thousands of happy customers trust the VigilantGuard Pro. It’s easy to use, built tough for harsh weather and sends instant AI alerts when it matters most. Dual night vision with HD Colour & Infrared lets you see clearly in the dark, while powerful red & blue lights switch on with motion detection to deter intruders. Trusted by security experts and everyday families alike. This is real protection without the hassle.
Key Benefits of VigilantGuard Pro
✅ Smart AI Alert System With Red & Blue Lights
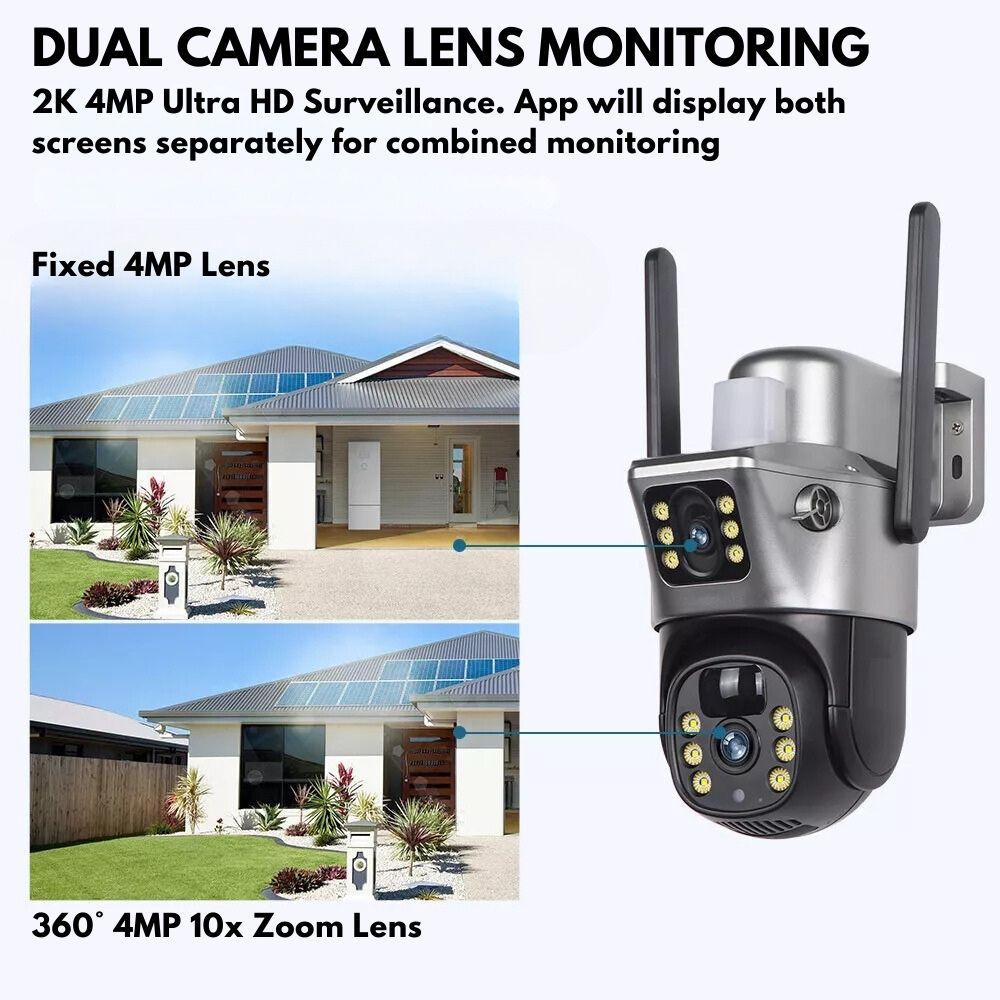
✅ Dual Ultra HD 2K Lenses For Clear Footage
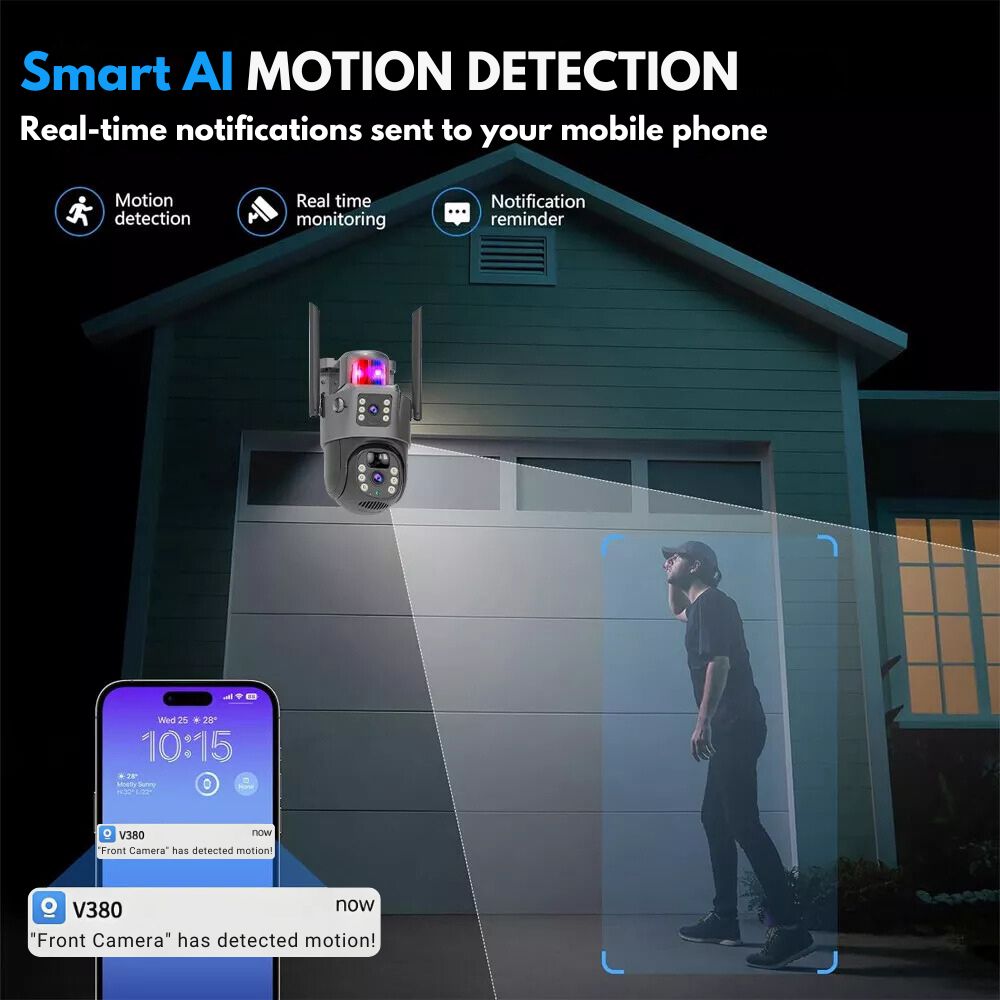
✅ Smart AI Motion Detection & Instant Alerts
✅ 16X Zoom Catches Faces & Licence Plates
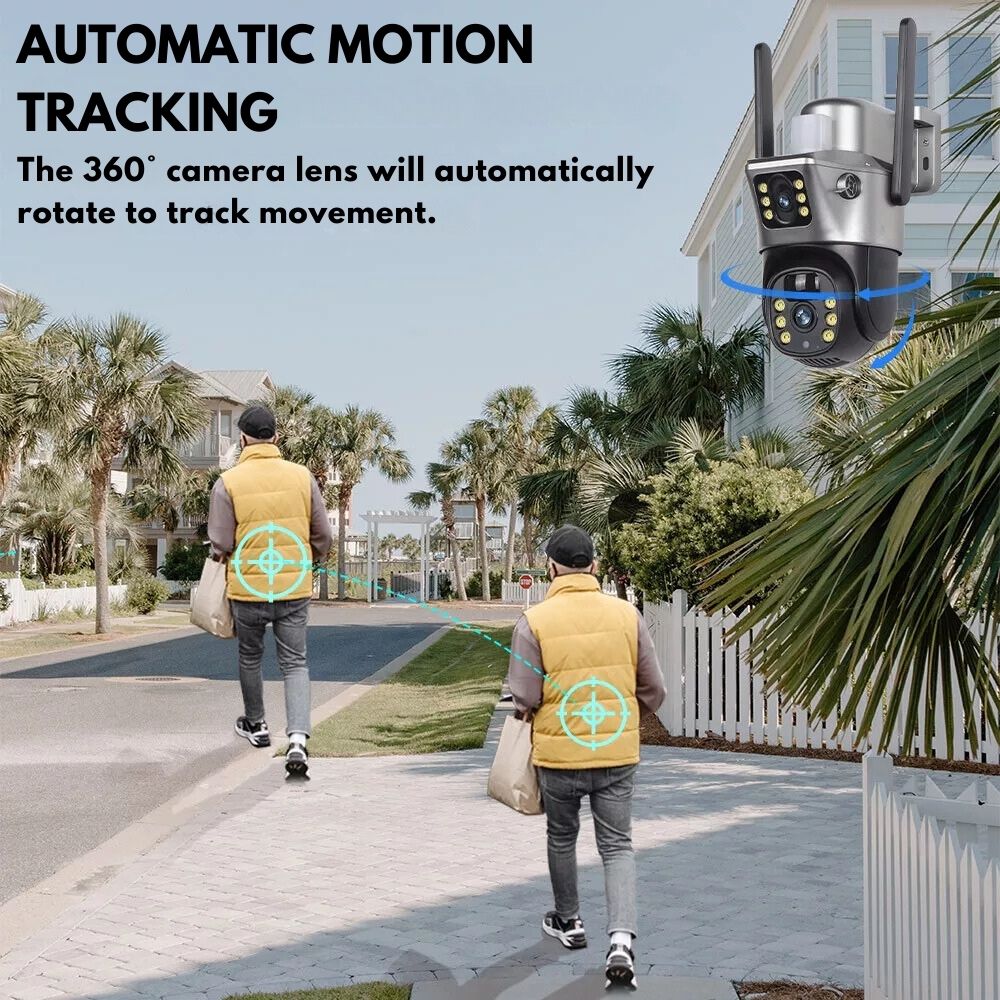
✅ Track Movement With Human Motion Tracking
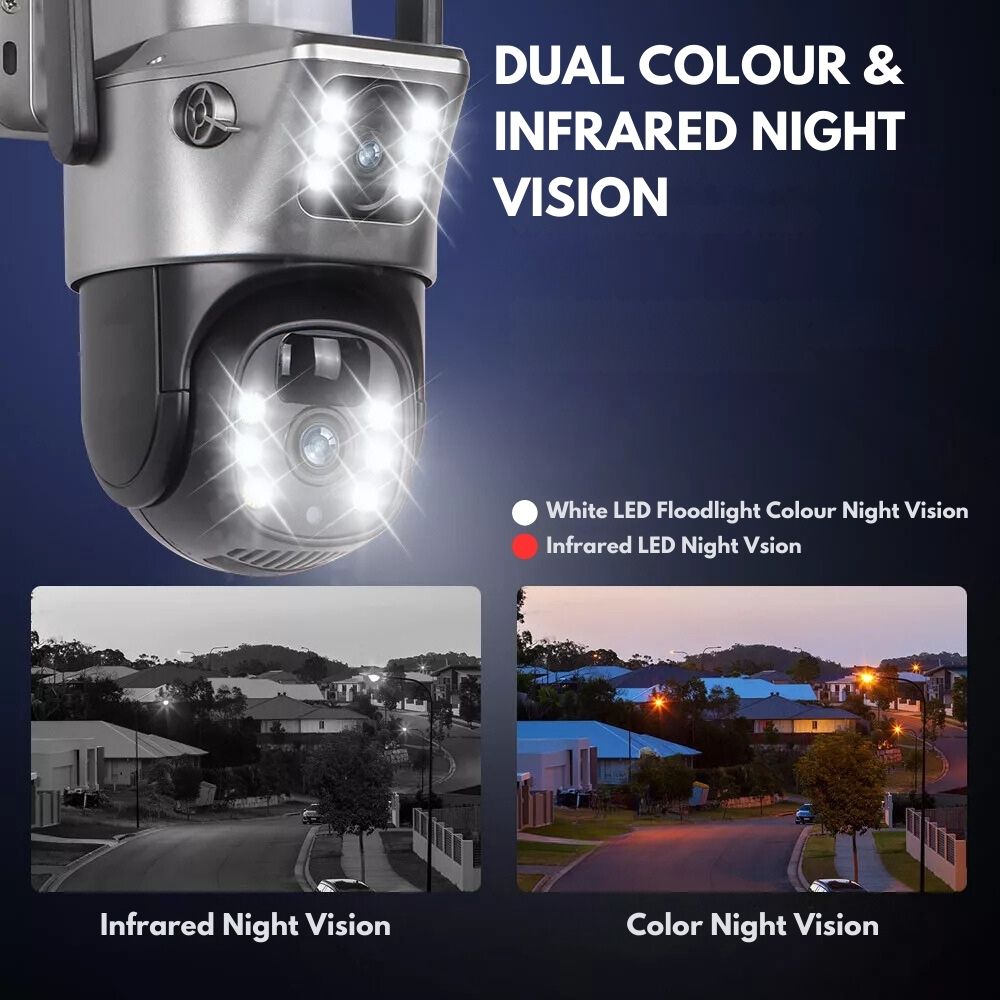
✅ Ultra HD Colour & Laser Infrared Night Vision
✅ Fast & Free Shipping On All Orders
✅ Australian Owned & Operated
✅ Risk Free 30 Day Money Back Guarantee
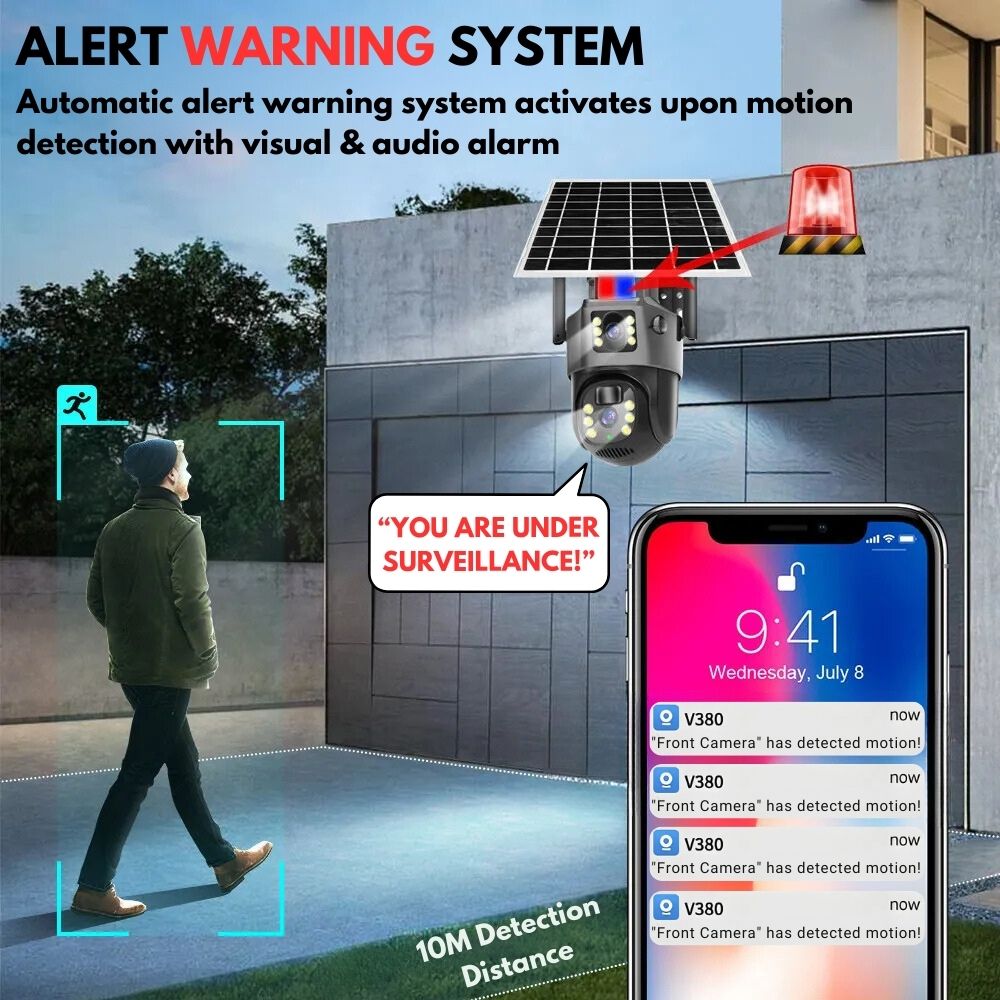
Flashing Lights, Sirens & Smart Motion Detection
Stay alert and in control with the VigilantGuard Pro. Advanced AI (Artificial Intelligence) and PIR (Passive Infrared Radar) sensors detect human motion instantly. Red and blue flashing lights activate, a loud siren sounds, and the camera automatically tracks the intruder’s movement. The event is recorded, and a warning alarm is triggered to scare them off before they get any closer. You’ll receive real time alerts straight to your phone so you can act fast and protect what matters most to you.
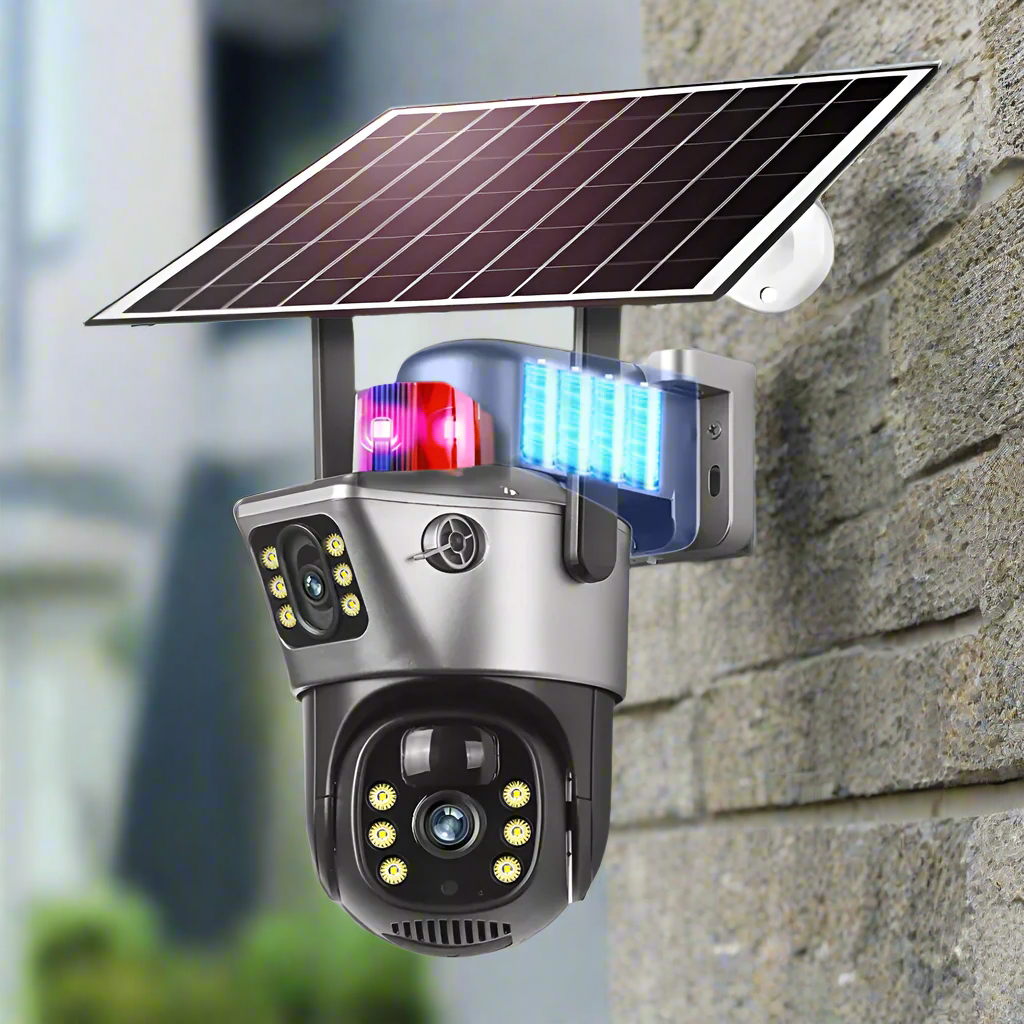
Easy DIY Setup – WiFi or 4G, Your Choice
Set up your VigilantGuard Pro in minutes without electricians or wiring. Choose WiFi for home use or go 4G for remote locations without internet. A 7.5W solar panel keeps your camera powered 24/7, and the included 128GB SD card gives you free storage with no monthly fees. Footage is saved straight to your phone gallery too! It’s smart, reliable solar security that works anywhere — without adding to your cost of living.
Feel Safe With Our 30 Day Money Back Guarantee

Feel safe with a 30 Day Money Back Guarantee - We are Australia's Leading Security store, feel free to contact us within 30 days of arrival and receive a FULL REFUND!
Specs
- Dual Lens 4MP 2K Ultra High Definition
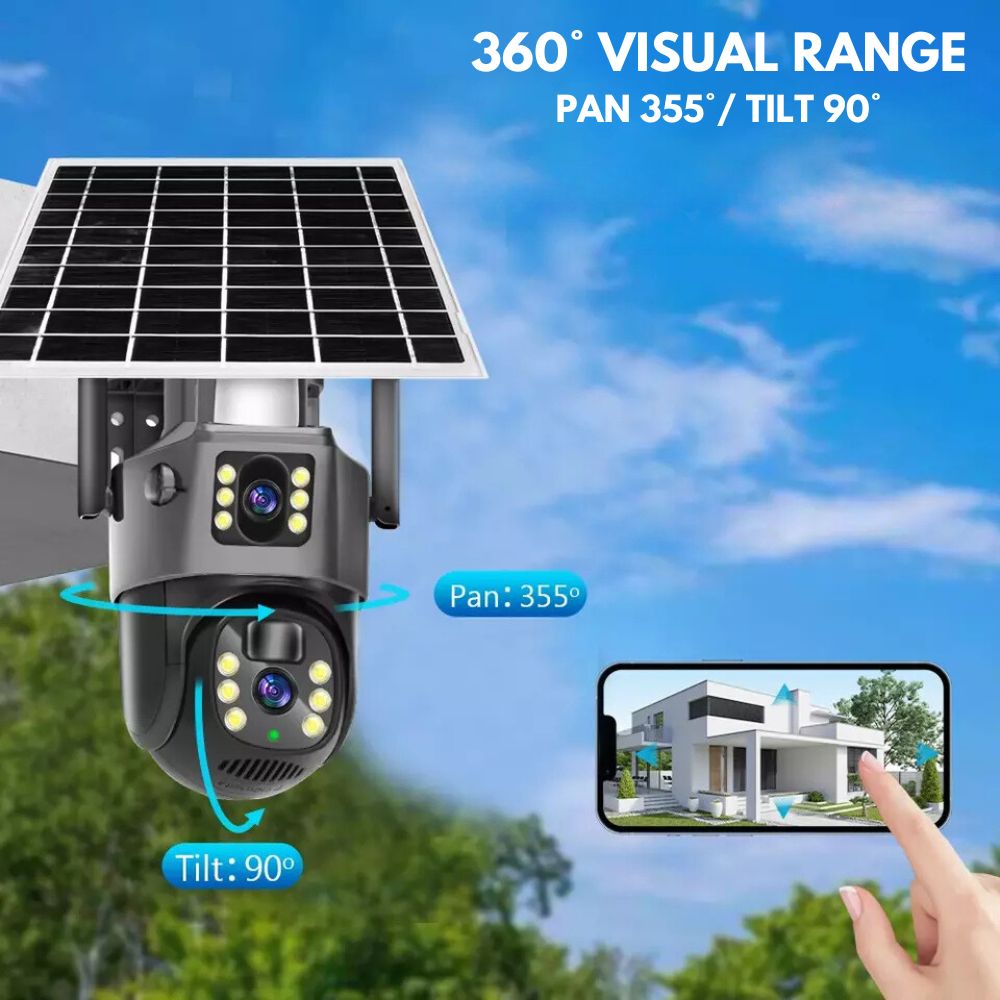
- 360° Visual Range With App Control (355° Pan & 90° Tilt)
- HD Colour & Laser Infrared Night Vision
- 16X HD Zoom
- Remote Viewing Via App
- Smart Instant Phone Alerts
- Automatic Human Tracking
- Intruder Alert Warning System – Red & Blue Lights + Loud Siren
- Incident & 24/7 Recording
- Smart AI (Artificial Intelligence) Motion Detection
- PIR (Passive Infrared Radar) Motion Detection
- 20m Detection Range
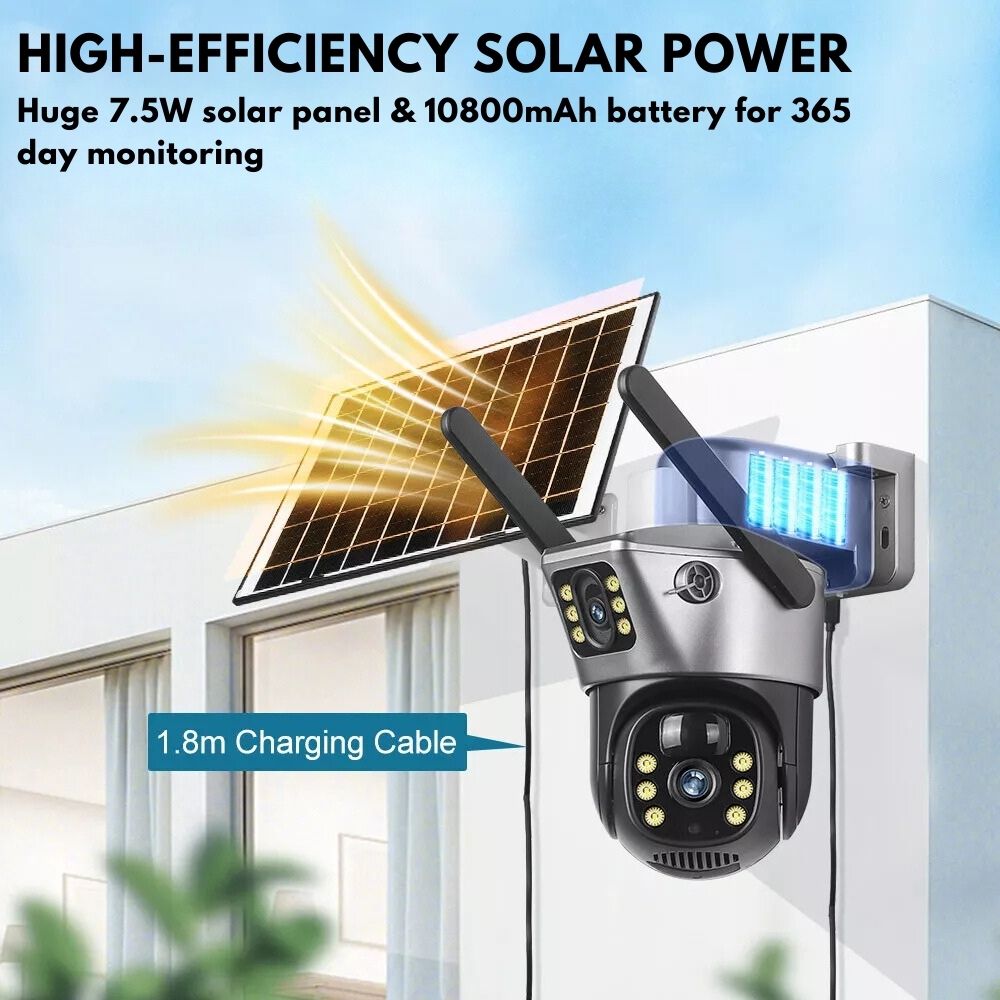
- 10800mAh Rechargeable Battery (Up To 180 Days Standby)
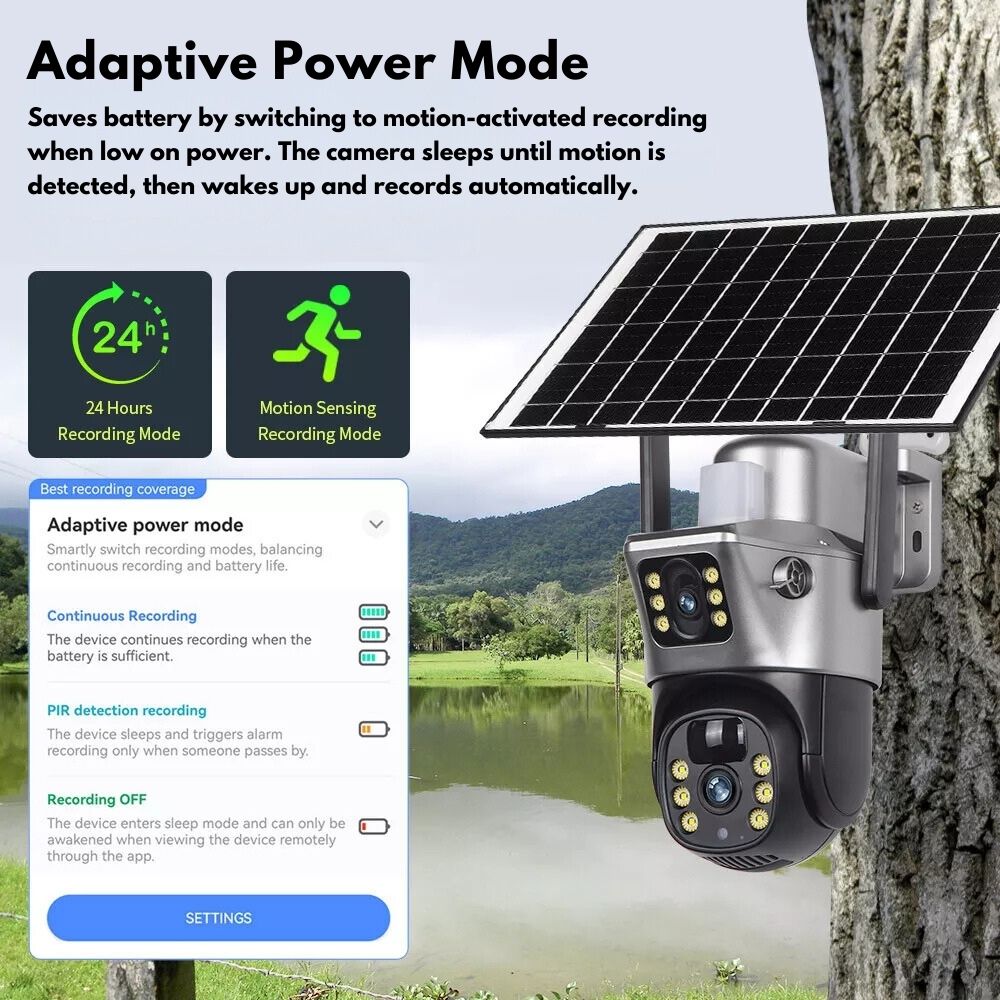
- Adaptive Power Saving Mode
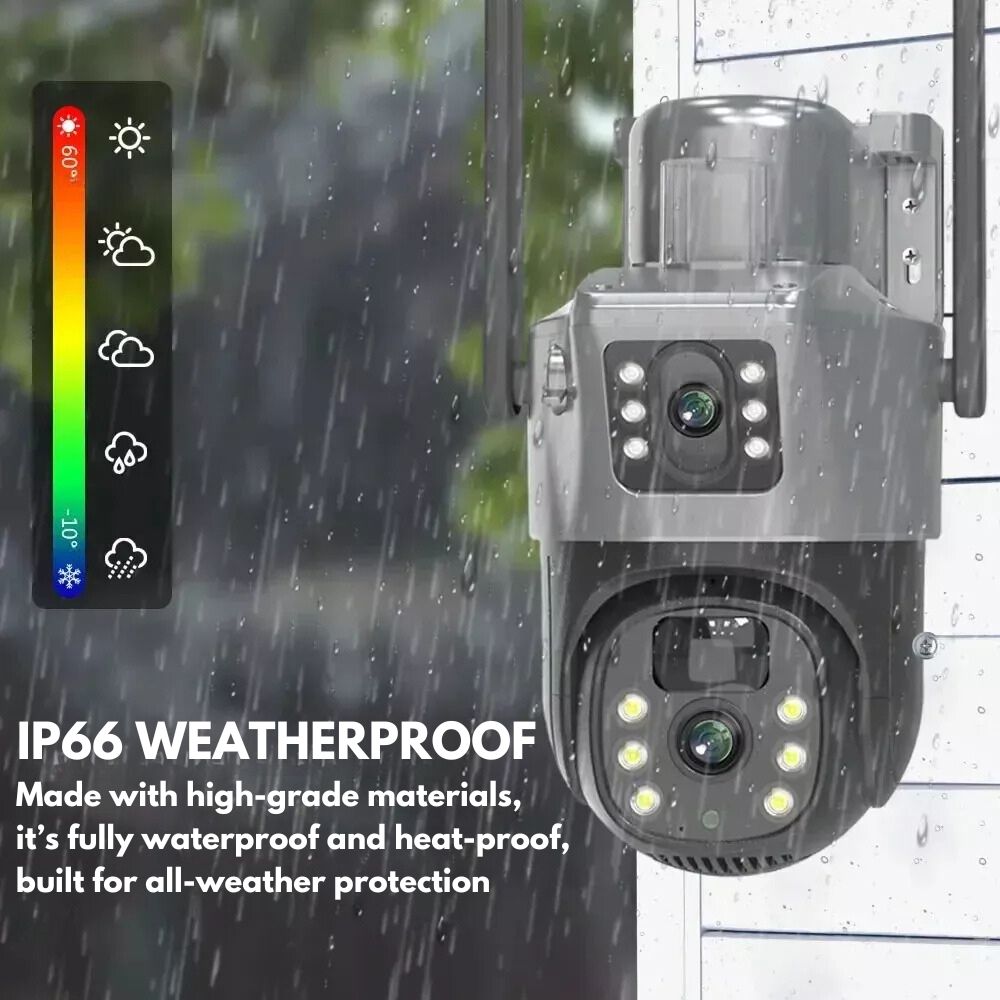
- Weatherproof IP66 – For Harsh Conditions
- 7.5W Solar Panel & 1.8m Solar Cable
- 2.4GHz WiFi Or 4G SIM Card Connectivity (SIM Not Included)
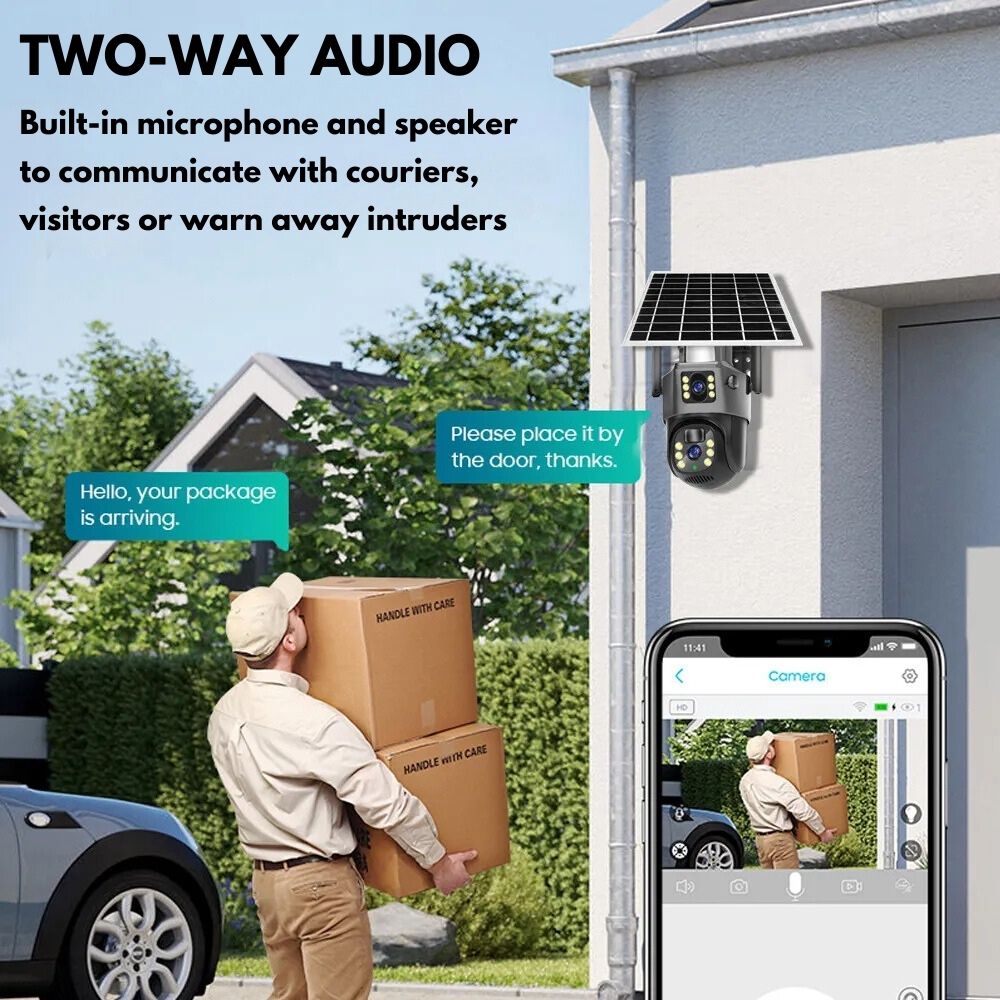
- Two-Way Audio With Mic & Speaker + Custom Audio Alerts
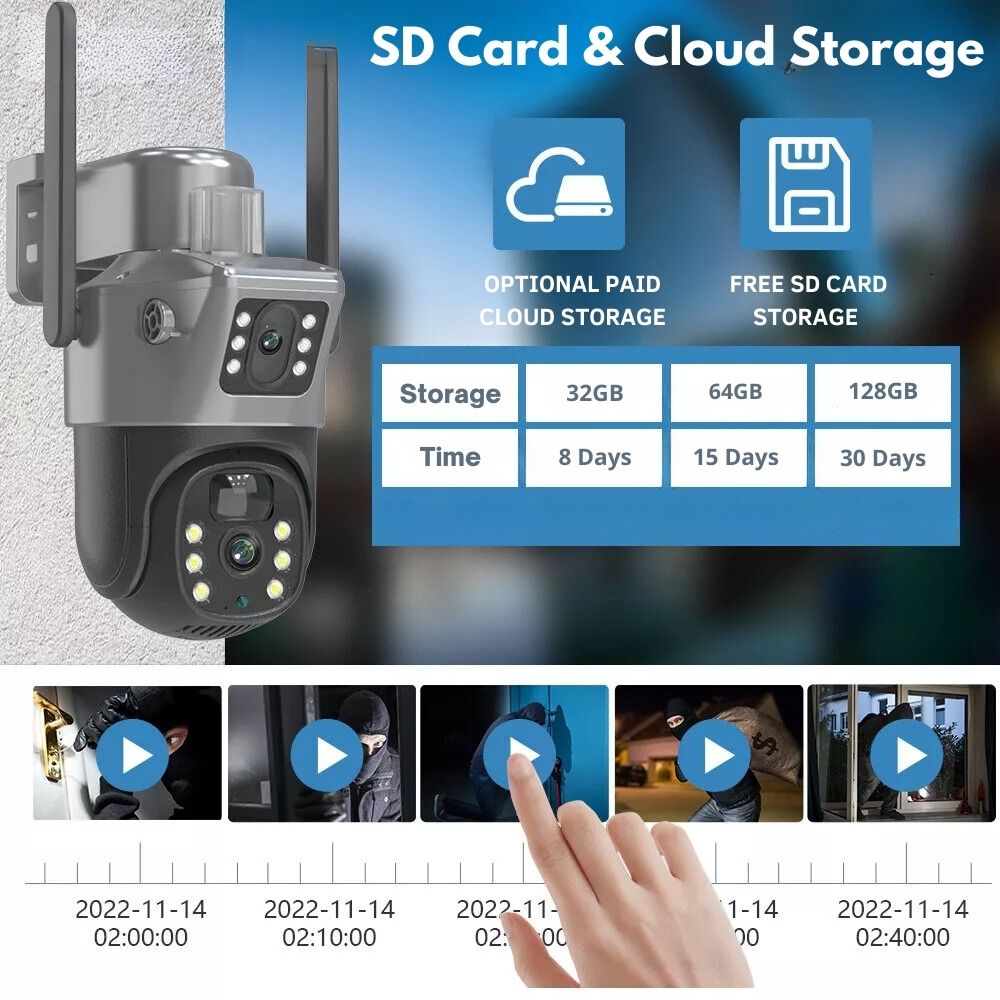
- FREE 128GB SD Card Storage Included Or Optional Cloud Storage
- Footage Saves To Your Phone Gallery For Easy Access of Recordings
- Connect Up To 24 Cameras On The One App
- Shared Family Viewing With Multi-User Access
- WiFi Model is Starlink Compatible
- App: V380 PRO (Apple, Android & PC) – User Friendly, Easy To Use
What's In The Box
- VigilantGuard Pro Security Camera
- 7.5W Solar Panel
- Solar Panel Bracket
- 1.8m Solar Panel Cable
- 128GB Micro SD Card
- Quick Start User Manual
- Easy DIY Installation Kit
WiFi vs 4G
WiFi Model: Perfect for homes or properties with a strong, stable WiFi connection. Make sure the location of your camera is within the range of your WiFi signal.
4G Model: Designed for rural or remote areas without reliable WiFi access. Requires a 4G SIM card from Telstra or Optus (Aldi Mobile and Catch SIM cards are not compatible). We reccomend a 5GB data only plan per month.
FAQ
Do I Have To Pay For Cloud Storage?
No! The VigilantGuard Pro offers Subscription Free Storage with Remote Access. It records all events and saves them directly to the SD card and your phone gallery for FREE. A FREE 128GB SD card is included! You also have the option to use cloud storage for an additional fee, but it’s completely up to you. Monitor everything from your phone, anytime, anywhere.
Do You Provide User Manuals?
Absolutely, each camera comes with a comprehensive user manual. Digital versions are also available for download below.
VigilantGuard™ WiFi User Manual
Is It Compatible With StarLink?
Yes! The VigilantGuard WiFi Variant is compatible with feeds from starlink!
Can I View Footage Remotely?
Yes! See live video or recorded clips anytime with the free V380 Pro app.
Can My Family View It Too?
Yes! Just share access through the app so multiple people can watch.
Can I Use Multiple Cameras?
Yes! You can connect up to 24 cameras to the same app on your phone.
Is It Easy To Set Up?
Very easy. Most people set it up in under 10 minutes.
Our customer support is always available to help. If you have more questions, please reach out to us through our Contact Us page.
WiFi Model – Set Up FAQ
Which App Do I Use?
Download and connect your camera using the V380 PRO app. Do not use the standard V380 app. Most connection issues happen from using the wrong one.
How Do I Set Up The Camera with my home Wifi?
- Fully charge the camera with a USB-C connection.
- Ensure your home wifi is set up for 2.4Ghz or dual band connection (2.4Ghz & 5Ghz). Contact your provider to verify. The camera can only connect to 2.4Ghz.
- Turn the camera on with the switch under the rubber grommet on the base of the camera.
- Reset the camera by holding the reset button next to the Micro SD card slot.
- Open the V380 PRO app.
- Tap the Add button.
- Select Add WiFi Cameras.
- Scan the camera’s QR code using your phone.
- Follow the in-app steps to connect to your home WiFi by enetering your wifi password.
- Scan the QR code the app generates on your phone with the camera by adjusting both lenses to point at the QR code.
- The camera should connect to your WiFi and begin functionality.
- If set up fails, reset the camera and try again. Sometimes a hardware reset is all thats needed.
How Do I Reset The Camera?
Find the reset button near the SD card slot. Hold it for 10 seconds until you hear “Reset Complete”.
What If The Camera Says “Offline” and i can't enter it?
- Tap the added camera on the app home screen until it asks you to Add a Password.
- Leave the username as Admin or create your own.
- Choose a strong password and keep it safe.
- Once the password is set, the camera will come online.
QR Code is not scanning?
- Adjust both camera lenses so they pointing at the QR code on your phone.
- Hold the QR code displayed on the phone screen up to the camera until you hear a beep.
- Ensure you are in a well-lit space and vary the distance if it is not working straight away.
Our customer support is always available to help. If you have more questions, please reach out to us through our Contact Us page.
4G Model – Set Up FAQ
Which App Do I Use?
Download and connect your camera using the V380 PRO app. Do not use the standard V380 app. Most connection issues happen from using the wrong one.
How Do I Set It Up with the 4G Sim?
- Fully charge the camera with a USB-C connection.
- Get your data only 5GB 4G sim with telstra or optus.
- Test the sim in your mobile phone to ensure it is activated and you can access the internet.
- Once the sim is activated, insert it into your camera, ensure it clicks in.
- Turn the camera on with the switch under the rubber grommet on the base of the camera.
- Reset the camera by holding the reset button next to the Sim card slot and Micro SD card slot.
- Tap Add in the app.
- Select Add 4G Camera.
- Scan the QR code on the camera.
- When the camera is detected, tap APN Configuration (don’t tap Continue).
- Leave Username and Password blank.
- Enter your network provider’s APN in lowercase ( telstra.wap or optus.wap).
- Make sure Username and Password stay blank or it won’t work.
- Configure The APN by Holding the reset button for 2 seconds until the yellow light on the camera blinks.
- Scan the QR code the app generates on your phone with the camera by adjusting both lenses to point at the QR code.
- Confirm the camera is connected & functional.
- If it didnt work, reset the camera and try again and ensuring the sim is activated.
How Do I Reset The Camera?
Find the reset button near the SD card slot. Hold it for 10 seconds until you hear “Reset Complete.”
QR Code is not scanning?
- Adjust both camera lenses so they pointing at the QR code on your phone.
- Hold the QR code displayed on the phone screen up to the camera until you hear a beep.
- Ensure you are in a well-lit space and vary the distance if it is not working straight away.
Our customer support is always available to help. If you have more questions, please reach out to us through our Contact Us page.